Back in October 2015 and 2016 I’ve written some posts related to the new Azure AD Domain Services feature of Azure Active Directory, which is a brilliant way to provide managed domain services like domain join, group policy, LDAP, and Kerberos/NTLM authentication, all fully compatible with Windows Server Active Directory. You can search and read these articles by clicking on this link here: https://systemplus.gr/?s=azure+ad+domain+services
We’re happy to see that today we have a user interface to manage this great feature just right into the new Azure Portal, so let’s see how it works. As you will see, it’s now possible to create virtual networks, configure group membership of the delegated administrator group, and enable domain services into a simple, intuitive, step-by-step experience.
-
If Azure AD Domain Services is not enabled for your Azure directory – Create a new managed domain using the new Azure portal, we’ll talk about this in a moment.
- If you’ve already enabled Azure AD Domain Services for your Azure directory – Contact the Azure AD team via email to migrate your existing managed AD domain to the new Azure portal. From there, you can administer your existing managed AD domain using the new Azure portal.
So what do you need to do in order to enable Azure AD Domain Services?
- Go to the Azure portal.
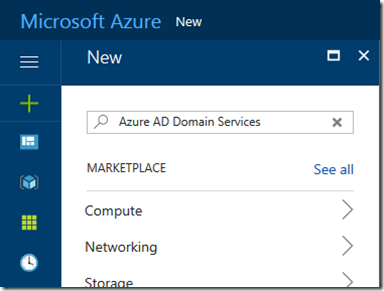
- In the left pane, click on New.
- In the New blade, type Domain Services into the search bar:
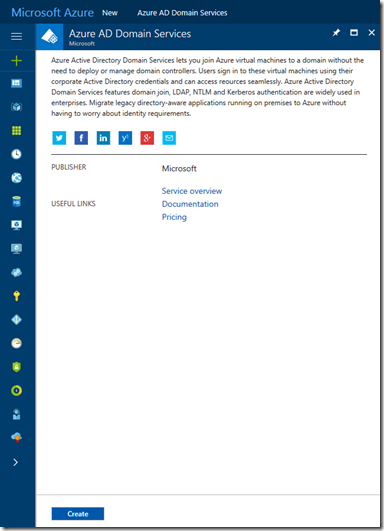
Click to select Azure AD Domain Services from the list of search suggestions. On the Azure AD Domain Services blade, click the Create button:
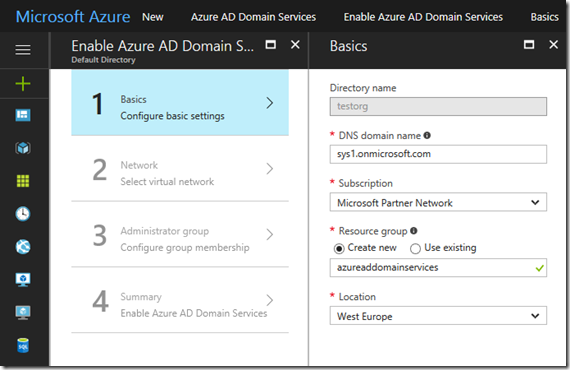
Then you should proceed to the next step, which is to specify the DNS domain name for the managed domain. You can also choose the resource group and Azure location to which the managed domain should be deployed:
Choose the DNS domain name for your managed domain.
-
The default domain name of the directory (with a .onmicrosoft.com suffix) is specified by default.
-
You can also type in a custom domain name.
Ensure that the DNS domain name you have chosen for the managed domain does not already exist in the virtual network. Specifically, check whether:
-
You already have a domain with the same DNS domain name on the virtual network.
-
The virtual network where you plan to enable the managed domain has a VPN connection with your on-premises network. In this scenario, ensure you don’t have a domain with the same DNS domain name on your on-premises network.
-
You have an existing cloud service with that name on the virtual network.
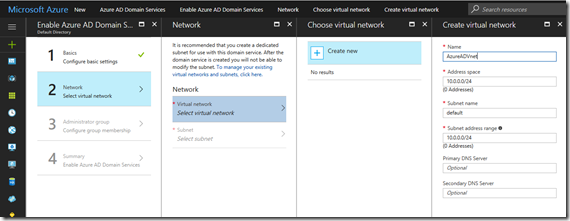
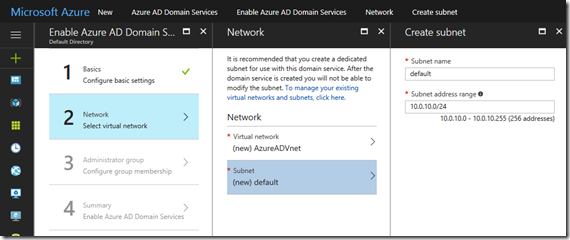
The next configuration task is to create an Azure virtual network and a dedicated subnet within it. Click Virtual network to select a virtual network.
-
On the Choose virtual network blade, you see all existing virtual networks. You see only the virtual networks that belong to the resource group and Azure location you have selected on the Basics wizard page.
-
Choose the virtual network in which Azure AD Domain Services should be enabled. Click Create new, if you prefer to create a new virtual network. It is highly recommended to use a dedicated subnet for Azure AD Domain Services.
Click Subnet to pick the dedicated subnet in this virtual network, within which to enable your new managed domain. In the Create subnet blade, specify a name for the subnet, and click OK when you’re done. For example, create a subnet with the name ‘DomainServices’, making it easy for other administrators to understand what is deployed within the subnet.
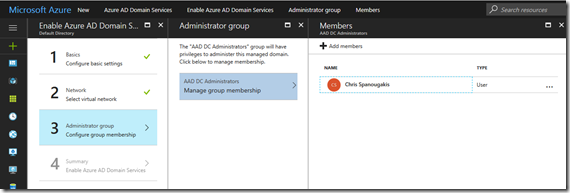
The last step is to create an administrative group in your Azure AD directory. This special administrative group is called AAD DC Administrators. Members of this group are granted administrative permissions on machines that are domain-joined to the managed domain. On domain-joined machines, this group is added to the administrators group. Additionally, members of this group can use Remote Desktop to connect remotely to domain-joined machines. The wizard automatically creates the administrative group in your Azure AD directory. This group is called ‘AAD DC Administrators’. If you have an existing group with this name in your Azure AD directory, the wizard selects this group. You can configure group membership using the Administrator group wizard page:
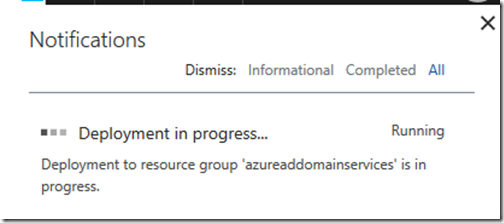
The last step is to actually start the deployment of Azure AD Domain Services:
Don’t forget to check the related documentation here.
Thanks for your time!

